Friday, March 27, 2009

Keeping the wet stuff wet. Wine not?

One of the major expenses of woodworking is finishes, solvents, glue & other "wet" chemicals that break down, dry out or otherwise react to oxygen / oxidizers. What to do about it?

We've all seen that commercially prepared woodputty is often sold in cans with the lid on the bottom - to open you have to invert it, and to store later with an upright appearance, you have to sit it back on the lid. Makes sense - the product goops itself to the bottom / lid, sealing the can, preventing air exchange & keeping it fresher, longer. Lots of condiments like catsup and mayo and so forth are coming that way these days too - same sort of reasoning. Trap a minimum amount of air and use the product to seal the container. I do something similar with cans of finishes / paint - after I get the lid down tight, I swirl the can around so that finish contacts the entire area of the join between the lid and the can, hopefully sealing it better than just the metal-to-metal connection of can and lid, even if I don't invert.
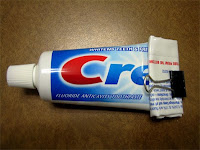
Another method is to reduce the size of the container as the product is used - toothpaste and caulk spring to mind, but I am also reminded of collapsible containers like those used in darkrooms to store chemicals and the mylar bag that makes boxes of wine possible, if not necessarily desirable. I guess for completeness, you can also put displacement in this category - like putting a brick in a toilet to reduce water usage, but keep the water level up. My favorite submethod is to simply move smaller amounts into smaller containers.
The third solution is to remove as much air as possible / vacuum pack things - with the use of a pump & containers that seal really well.

The method I've been thinking about today is another sort of displacement, suggested by my buddy Mike. Instead of displacing product, why not displace the air? There are plenty of inert gasses that are heavier than air. Just "pour" a heavy inert gas into a container, forming a gas lid on the surface, blocking any interaction. Makes me recall the wax lids on the surface of my Grandmother's homemade jellies. There are commercial products available for doing this for wine, and now, for woodworking. Private Preserve is the original method for wine & is composed of argon, carbon dioxide and nitrogen. If you already have some, you can use it in your cans in the shop (and darkroom) too! But Bloxygen is used in exactly the same way (although it appears that it contains just argon from what it says on the label) for about the same price and may be already available in your local woodworking store. And hey, who wants to go to a wine store when you can go to a woodworking store?

Thursday, March 19, 2009

A few favorite woodworking books

My first favorite woodworking book is actually a set of three great books by one great woodworker. Tage Frid Teaches Woodworking: A Step-By-Step Guidebook is my recommendation for a first group of books for not only a beginning woodworker, but for ANY woodworker. Sometimes volumes 1 & 2 are combined in one book, with volume 3 separate. If you can afford it, I like the offering of all three books, with a bonus DVD available from Lee Valley. I haven't seen the DVD, but have read great things about it. Shrug, may make it worth the price! A lot cheaper than the same set directly from the publisher. But, if you are looking for just the books, you should be able to find them used for a total of less than $30 for all three.
If you are looking for used copies, phone calls to local bookstores are sometimes fruitful, but I really like ABE books if your local options are limited. I also like Daedalus Books, which is often worth a look for newer titles, but is hit and miss.
Second, I would recommend any of the five or six books by James Krenov - don't I make shopping easy? (Grin) If you need a place to start, I recommend his "A Cabinet Maker's Notebook" which was first published in 1976. Yes, there are a number of master woodworkers out there, including my favorite Sam Maloof, but start here, even if you don't like what Krenov makes. He writes well and conveys information in a clear easy to read style. His writing got me excited about doing excellent (instead of workmanlike) projects. If you don't immediately buy "A Cabinet Maker's Notebook", find any of his books in a brick and mortar store, open to a random page, and begin reading. If you end up standing in one place long enough that your feet fall asleep, buy the book.
My last recommendation is Peter Korn's Woodworking Basics: Mastering the Essentials of Craftsmanship which is a great step-by-step series of classes in book form. While no book can completely substitute for the presence of a teacher showing you the way, I think this book has enough detail to move you in the direction of becoming a great woodworker. I feel this book also serves as a good introduction to the Taunton Press series of the "The Complete Illustrated Guide To" books, which are all wonderful and written by masters. I was able to get most of the series from Daedalus at a sharp discount, several years after they were first published. Really, it all depends on where you are going with your woodworking & what tools you are using to get there. For example, if you do a lot of woodworking on the bandsaw, I have to recommend Lonnie Bird's "The Bandsaw Book". And if you are interested in lathe work there is no better book than Ernie Connover's "The Lathe Book". Gotta love the unambiguous titles! It all depends on the direction woodworking pulls you. Oh - don't forget your local public library when it comes to woodworking books or any printed matter. Best place in the world to try before you buy. Clubs and Guilds often have great lending libraries available to their membership; another reason to get involved locally with other woodworkers.

Tuesday, March 17, 2009

Supplying power to your tailed devils

Power tools are tricky. It doesn't help that many manufacturers give horsepower and power requirement ratings based on the motor being unloaded (not doing any useful work, just spinning freely.) The bottom line is, most of us working in residential shops have tripped a breaker operating a power tool (generally a 110v contractor's tablesaw cutting an uncooperative piece of hardwood.) A 1 horsepower motor requires 960 watts of power, which is about 8 amps of power. That is just a bit more than half of the rated 15 amp load of the outlet in the first picture to the left. No problem, right? Well, generally wrong - each circuit at the breaker panel is generally supplying multiple outlets... ...and if you are in a garage or basement shop, probably also the power for whatever overhead light you may have. This becomes clear when you trip a breaker and are left standing in the dark. Plus, if you are running your tools at the ends of long extension cords, the resistance of the cord comes into play, which means that there is less power available to your tool. You can easily figure out exactly how overloaded your circuits are by dividing the watts required for a particular tool (or light or other device) by the voltage (110) to get amperage: A 100 watt lightbulb is 100 divided by 110 giving .9 amps. Add up all the amps being supplied to everything on the same circuit & you have your (over) load. What to do about it?
First, have an electrician add a new 20 amp breaker (or two or five) supplying power to new 20 amp outlets positioned where you need them. Again, calculate the load to determine how many separate circuits you will need. Dust collectors, table saws and any big stationary tools draw the most. Make sure that 12 gauge wire is used, which is a lot thicker than the wire used for 15 amp outlets. Also make sure that your new circuits are separate from any other demand (like lighting) and are dedicated for just your power tools. This way at least you won't be in the dark when you trip a breaker. Your new outlets should look like the one in the second picture to the left. Try and keep each circuit as unloaded as possible. Remember, whatever the breaker is rated for is what it will trip at. Trip a breaker enough times and it will wear out, requiring replacement. Try for around half the load it will trip at. Yep, that means that you'll probably want one outlet with a dedicated breaker for your table saw.
Second, use the shortest run of the heaviest gauge extension cord that will get the job done. Sure, I have a 50' extension cord of 10 gauge wire for those times when I am really far away from an outlet (or powering a tool from my noisy gas powered generator) but in general, the shortest route to your power is the best. Ideally your outlets will be places so that no extension cord is required, but that is rarely going to be the case. This is where the third picture comes into play - my favorites extensions are short (3, 6 or 12 foot) air conditioner / heavy appliance extension cords. They have a right-angle plug which resists being pulled from the wall accidentally and because they are heavier / have more copper per foot and are short so they lose less juice on the way to your tools. Plus, you won't be tempted to borrow them for times when you need a long extension cord for some other purpose. And because they are short they are cheap enough that you won't mind dedicating a few for your main tools.
I haven't even mentioned what happens when you graduate to a 220v single-phase cabinet saw, but it is much the same as above - only 1 outlet connected to the breaker. I hope this helps the next time you are guiding a piece of wood through your saw and end up standing in the dark. The time to fix that problem is NOW, before it happens again.

Sunday, March 15, 2009

Restoring the look of a 1950's bathroom cabinet

Even just a few years ago, this would be the before picture of a bathroom cabinet. But, in the early 50's, Ranch style houses often had "Ranch" fixtures and cabinets - varnished or shellacked, with exposed hammered-look hardware. For many years this dual sink base cabinet (and hinges & pulls) were painted, to make the bathroom more modern. During a minor bathroom renovation, the paint was stripped and we did the following to restore the look:
1) Sanded out the raised grain, and tried to eliminate (as much as possible) the white paint in the ends / edges of the birch plywood & even penetrated into the surface. Then applied several coats of clear Varathane over the natural wood. In this flash picture, you can see some of the white that was left in the wood. It looks a lot better / is less noticeable in person! Where the white paint was the hardest to touch was the plywood edges of the drawers and doors. If I was doing this project again, I would have edge-sanded longer, or used a permanent brown marker to color the traces of white before Varathaning.
2) Cleaned and restored the hardware. This was the most interesting part of the project. We cooked the pulls, hinges and screws in water in a crockpot for an hour, which completely loosened the remodel latex paint - most of it flaked off in large wet patches. But, as the hardware was mechanically rolled or pressed to give a hammered look, there were plenty of nooks and crannies that the paint wouldn't come out of. A wire wheel on a stationary grinder was used to remove the remaining paint. Instead of repainting, the hardware looked so good that we dipped each piece 3x in Varathane and suspended them by the screw holes to dry, reversing top and bottom each time to give a good coating & avoiding any bubbles or drips. The brushed-aged-steel look is still pretty dark & I think better looking than the original black.
3) Re-installing everything. Attaching hardware to drawers and doors, attaching everything back to the cabinet... Well, almost everything. During the cleaning and coating of the hardware two hinge pins and a couple screws were lost. Drat! How to match the 50+ year old hardware? Was easier than you would think. My favorite hardware store in the world, my local Suburban Ace Hardware fixed our hinge pin problem with tiny single-hole Clevis pins that we ground the tops of to have a similar appearance to the original. The screws were even easier - we bought 2 round-head plain steel slotted screws of the same size as the originals, used a hacksaw to give them the Phillips-head look, and ground the heads to match. I think I'm the only one that can tell which ones aren't original.
Digression - did you notice the guest appearance of a PC "Quicksand" random orbital sander in picture? This is what we used to finish sand the cabinet face-frame and doors. One of my favorite sanders. As you can see from the Shade-tree-engineering blue painter tape, not a fan of the way the porous dust collector cup attaches.
In conclusion - I like the look of natural wood & avoid painting wood whenever possible. I wish stripping paint off wood was as easy as using a crockpot to strip hardware!

Monday, March 9, 2009

Circles and angles, part 2

I had a couple thoughts about circles and using circles to approximate angles and using circles to reduce angles.
The second (covered here) is that the bigger a wheel is, the better it is at rolling over obstructions, or climbing angles - that applies any wheels: on cars, or in this case, mobile tool bases, benches and carts.
If you have a perfectly flat shop floor, small wheels (assuming that they are rated for the load and won't develop flat spots) are perfectly fine. If you have to go over any bumps like I do (there is a noticeable lip between garage floor and driveway for me) the larger the wheel, the smaller the angle of attack / the easier it will be to roll items across any floor height differences. Also, if your wheels do develop small flat spots, the problem will be less noticeable with larger wheels. 3 inch wheels are about the smallest I would want to use to make a heavy stationary tool roll, but for anything lighter weight that is going to stay in the shop, even the smallest casters would work fine. Something to consider when choosing mobile base options for equipment likes table saws. The mobile kit I got for my first table saw was useless & required me to physically lift the saw to clear even minor differences between concrete pads. There are "all terrain" kits out there now with larger wheels, but then they ruin things by making the clearance too low - makes me think of off-road vehicles without a lift kit. One side clears edge, only to high-center before you can get the other side up-and-over. A strong case for rolling your own. Snork.

Thursday, March 5, 2009

Circles and angles, part 1

I had a couple thoughts about circles and using circles to approximate angles and using circles to reduce angles.
The first (covered here) is that when you are using a bench grinder to rough grind a tool to a particular angle, the larger the wheel, the closer you will get to the actual angle - with a 12 inch wheel the difference is quite small. My illustration exaggerates the differences by showing 3" thick tools. Even a Hock iron for a Stanley handplane is only 3/32 inch thick. There are two schools of thought. First, if you like the look of a true angle, the larger 12" wheel size (which is nearly synonymous with the Tormek system) is better. Second, if you are re-honing the tool fairly frequently to keep a sharp edge, you will have to do less work if you started with a smaller diameter wheel & will only have to regrind when you finally bottom out / completely flatten the concavity created by a 6 inch or 8 inch wheel. At least that is what we folk without a Tormek grinder keep telling ourselves! Hehehe.
If you are grinding to shape the edge and then using oil or water stones or "scary sharp" sandpaper sharpening or any other flat sharpening system out there, simply sharpening the tool edge and the heel really does make a lot more sense. It is nice to have a hollow in the middle. The hollow keeps the tool from rocking (which can cause rounding) and causes you to hone less surface area. It does look weird to some people, however.