Wednesday, May 27, 2009

Reproduction Stickley hardware

One project that I've been stalled on for a while (for a variety of reasons) is now hinging (snork) on finding suitable hardware. Actually, I've found good hinges, but the pulls are what really show / what people will be handling. As it will be in quarter-sawn Oregon White Oak with only simple detailing it seemed only appropriate to use Craftsman/Stickley-style hand-hammered copper hardware at least for the pulls. Rockler offers a line of hardware made by Stickley in cast copper - perfect, right? Well, maybe. Note that I said "cast" rather than "hand-hammered" - take a look at this close up of one of the pulls Rockler offers. I've only seen a few good Stickley pieces with this sort of pull, and they did not have the same feel as the one pictured above. But, "Patterned from the original designs of Gustav and Leopold Stickley, this cast copper hardware has been re-issued by the Stickley Furniture Company exclusively for Rockler!" means that commercially, these are about as close to the best match available, right?
I did check on a couple antique sites and found one that had a pair of real 1905 - 1912 Stickley pulls for $265. Ouch. This Popular Woodworking Blog entry has a few pictures of what original hardware looks like. Yep, not cast - made from coppersmithing / peening together pieces of copper sheet and cast or thick wire for the actual pulls.
This great blog entry by Mark A. DeCou on Lumberjocks shows a way I might get what I want, but not without learning some new tricks & buying some copper stock. There are commercial ways of getting a good patination on new copper work, I'd have to use one of those methods as bright copper isn't what I would be after. I think a trip to the bookstore may be in order, and perhaps a trip to a library as well. I can make or buy nice oak craftsman pyramid knobs for the pulls, but just not what I'm after. Any suggestions appreciated!

Tuesday, May 19, 2009

The measure of things


I started piano lessons when I was in the 2nd grade... ...but what does that have to do with woodworking? It was the first time I can recall that I was interested in the reach of my hand, tip of pinkie to end of thumb. The piano keys made a simple ruler for measuring hand size. After I got my full growth as a teen, my reach ended up at just a smidgen over 9 inches. Funny, I got this image from a Girl Scout site - the PDF is actually pretty useful, and exactly what I wanted to write about today.
It often happens that I need a rough measurement and don't have a rule in my pocket, or a tape measure at my belt. I often use my hand to get a rough measurement, often walking my hand along 9 inches at a time to measure something up to around 45 inches or so. But, hands come in all different sizes. Finding the reach of your hand, finding a 1 inch knuckle joint, walking heel to toe to pace off the dimensions of rooms based on the length of your shod foot - all great, all handy. But what if you need a more precise measurement, or one you can have someone at the other end of the phone use? What common objects are handy (snork) for everyday measurement?

For starters, paper money is good as almost everyone has a dollar near to hand. A piece of US paper currency is 6.14 inches long - close enough to 6 inches for most purposes. Folded in half it is 3 inches, in quarters it is an inch and a half. It is also 2.61 inches tall, but I never remember that.

Coins are pretty good too. A US quarter is 0.955 inches across, and 0.069 inches thick. Not so useful if you have a good eye for such things, or are already trained to instinctively use a finger joint to measure an inch, but really handy when relaying size information remotely. A dime is 0.7 inches across and 0.053 inches thick, but I don't find that as generally useful as remembering the size of a quarter and a dollar bill.  (added Sept 29, 09) I recently read that I neglected the cent!  A Penny is 3/4 of an inch across - well worth noting.

The last one pictured is simply the reach of your outstretched arms. Pictured is Leonardo da Vinci's "Vitruvian man" which was named after Vitruvius who was a Roman writer in the 1st century BC who set down ratios for human proportions. Bet you always wanted to know that, huh? (grin) So, however tall you are, that is generally the reach of your outstretched hands. The other measurements I like to be aware of is typical (Ok, favorite) chair seat, desk/ table, and kitchen counter heights - I measure those against my body. Perhaps not as handy as the above, but very handy when shopping for furniture. I really can't talk any more about it now, as it leads more deeply into the Golden Proportion / Golden Ratio!

Friday, May 15, 2009

Howard Feed-N-Wax

I've been catching up on the backlog of projects I have for friends and family lately. One project was a few single-shelf bookshelves. The first one I made was out of English Walnut and I finished with Howard Feed-N-Wax - the easiest finish / non-finish possible. Apply it, wait for 20 minutes, wipe/buff off the excess. The reason I say non-finish is that although you can apply it directly to bare wood as I did, many people recommend that you use it over a another finishing product. If there is any chance the project you are finishing is going to get wet, this is probably not the right choice! Also, you'll have to re-apply occasionally to keep the appearance up. Like all waxes, eventually it will volatilize and end up in the air - it does not just soak into the wood, it evaporates. But, if you are looking for a finish that will show off the wood and doesn't form an obscuring film, this non-finish is better than no finish & really enhances the appearance of hardwoods with smaller pores. I'm not sure I would use Feed-N-Wax directly on Oak, or on softwood, but I think it is worth your time to try it. Howard does have a product called Restor-A-Finish that they recommend that you apply to Oak first, but I haven't tried it.
I first heard about using Feed-N-Wax as a finish a couple of years ago on this page in an article called How I Clean Wooden Tools... by Ray Drake that gives a great step-by-step approach to cleaning wooden tools / tool handles. For cleaning wood, that is the simplest / most foolproof method I've seen.

Tuesday, May 5, 2009

How to Finish Wood AKA reading Bob Flexner

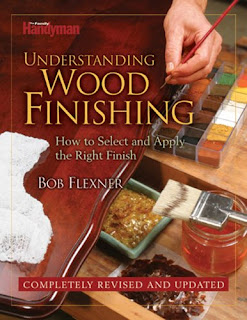
I sat down to write an entry about a book I have really been enjoying the past couple of weeks. Understanding Wood Finishing: How to Select and Apply the Right Finish by Bob Flexner is easily the best book on the process of putting nearly Any finish on wood that I've ever read.
The funny part is that there were a few times that I caught myself thinking "I knew that." So I decided to look back and see where I learned that something originally. Often enough, it was an magazine article by Bob Flexner! So, I changed the focus of what I was going to write about.
First of all, buy the book. It dispels a lot of the myths and disinformation that is out there. Since applying an organic or inorganic finish is still chemistry, Mr. Flexner takes that approach to explaining the important bits. Plus, it is intensively visually oriented with more pictures and illustrations then there are pages in the book; which makes sense in a book about finish and finishing techniques. I like the sidebars, which include finish recipes, tips, and myth vs fact entries. Also, with individual chapters devoted to each type of finish, it is easy to find what you are looking for. However, without parroting or paraphrasing from the book (or pointing out that you can use Amazon's Look Inside feature to actually read portions of the book) I thought I'd list a couple of Bob's articles that are available online.
A Primer on Solvents
PROTECTING EXTERIOR WOOD What Manufacturers Won't Tell You
The 7 Myths of Polyurethane
How To Brush a Finish
Heck, that is enough - it isn't tough to use Google, or go on the Popular Woodworking Magazine website and search for Bob Flexner. And buy the book - you'll be glad you did.