Showing posts with label tool repair. Show all posts

Monday, September 28, 2009

Replacing tool power cords

"Tailed assistants" if they are helping you, "tailed devils" if they are part of the problem.  I was all prepared to do a step-by-step power cord replacement post, but found one on the Fine Homebuilding website that did it better than I would have.  Read this great article by John Ross on replacing circular saw cords and triggers.  It is from the original Fine Homebuilding Magazine article in 2007, but it is timeless & well worth reading.  Reading it did bring up a few ideas that are topical though - you do have some options when replacing power cords.  It is true that for safety you want the outer sheathing to be unnicked and unpatched, but there is a great difference in opinion on how long a power cord should be.

If you cut through your cord, you could simply add a new plug to the existing cord at the break, without the need for disassembling the tool itself - assuming that you can live with a shorter power cord.  If this is the direction you want to go, there are a great variety of tool plugs that you can get.
A lot of contractors like short cords with twist-lock plugs - especially for roof framing where losing connection between a framing saw and the extension cord can not only mean time lost, but can be a hazard to anyone below.  Personally, I favor the standard "Edison" standard wall-plug connectors that most tools come with by default, as rewiring or using adaptors can be an expensive proposition and I'm not on a roof with a saw all that often.
But, having a cord pull out is a pain and my favorite solution is a right-angle replacement plug which fixes the problem nicely.  It provides just enough friction that accidental disconnects don't happen very often, if ever.
Another alternative to buying a replacement cord is to go the other way - use the piece of severed cord with molded plug attached (or whatever clean length of cord there is between the plug and the break or abrasion) and replace the "stub" as in the above Fine Homebuilding article.  You may have to put your own connectors on it, or use a soldering iron to tin the leads, but it is a darn sight cheaper than buying a new cord from the manufacturer. Actually, I've only bought a new replacement power cable once - and that was because the strain relief was ruined, and the new cord came with one specific to the tool which was molded on to the cord rather than a separate part.  Even if you aren't busily ruining power cords yourself, the most common defect you run into when buying a used power tool is a bad cord - generally repaired with miles of black electrical tape!  Getting comfortable making this type of repair will keep you a good deal safer and good tools out of metal recycling bins.

Saturday, September 19, 2009

The camera as a shop tool

Everyone has used a camera to visual document what is happening at a particular moment in time, even if it is just snaps of family and friends.
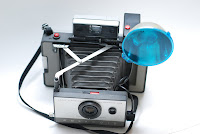
What I want to talk about is how many different ways there are of using a camera in the shop, or for woodworking related activities & how digital cameras and camera phones have changed the way we can use pictures.  Old school was taking a picture, getting the film developed and pictures printed & then seeing what you have - with some chance of repeatable results through reprinting using the negatives / enlarging and printing details of a snapped photo.  Polaroid technology gave us instant results - and the only chance at repeatabilty was from viewing the resulting picture and re-taking a better shot. 
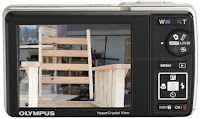
Digital camera technology, whether in a discrete camera, a cellphone camera, or even in a device family that started out as a music player and continues to add features has the best of all worlds - an instant look at the image you've captured and the ability to edit an image in endless ways after the fact before you print it - if you ever do. Frankly I rarely print pictures anymore.
Regardless of the history lesson, for most people, film cameras of any sort are dead, so I will be focusing on the use of a digital camera / camera phone for woodworking purposes.  Sure, there are still plenty of people getting film developed, but when a serviceable point and shoot 5mp camera costs less than developing and printing costs of 6 rolls of film I have a hard time understanding why.  Shrug.  Dismounts soapbox.
Most of these tips are of course usable for more than just woodworking, but if I didn't limit the focus of this blog, it would be pretty random!
  • First, there is the act of recording your work - even if it is just for yourself, a good photographic record will keep things crystal clear, long after your memory has faded.   Howard Ruttan said it best, here and has plenty of good "how to" tips, too.
  • Take pictures of products / product barcodes instead of hand written notes when going to the store to buy more - I've found this especially helpful when buying cans of finish, where you need to buy more of exactly the same stuff, but don't want to drag the entire can with you - I use the camera on my cellphone for this and don't bother printing - I just view the image on screen.  Can price shop this way too - take a picture of the product barcode and price tag, and use the info to shop for a better deal after you leave the store. 
  • Take pictures of furniture / ideas that you really like that inspires you.  I've done this with fellow craftsman's work (with their permission) and at furniture stores (well, I've never been asked to stop.)  When I see something I really like or want to duplicate or make my own version of, I take a quick snap.  I keep a folder of images on my computer full of pretty furniture - and details of furniture I particularly like.
  • Decide on finish - depending on what image editing / manipulation software you use, you can take a picture of an unfinished piece and can play with color digitally before committing yourself.
  • Use a cropped digital image in a Google Sketchup drawing to see if it is what you / you client wants - as long as the angle you take the photo at is appropriate to the view you eventually want to look at, Sketchup is quite accomodating - simply align the drawing to the image.  You can do it the other way too - take a picture of the wall a built-in or any other piece is going to be against, and position your Sketchup model against it.  Get the sizing just right, then use relative measurements to perfectly size the piece you are making.
  • Tool repair - any sort of complicated dis-assembly can benefit from pictures along the way to aid in re-assembly.  Actually, this tip is what caused me to write this entire post - was about to strip laces out of a pair of shoes preparatory to tossing them in the washer & out of habit took a picture of the way they were laced, so I could re-lace exactly the same way. 
  • Using a camera as a magnifying glass - when working on something tiny, a camera that has a good zoom feature that works well in low light situations can help you without even needing to take a picture - just use it as a really expensive combination lamp and magnifying glass, or snap a picture with flash to see around corners / into dark, awkward or tight spaces.
  • Take pictures at auction previews, estate and garage sales - or any other buying situation, including wood purchases.  This is where a cellphone camera shines - especially if you see something someone else can use - email or message the picture and get an answer back immediately rather than attempting to describe.
Well, that about wraps it up - oh, one final tip - as soon as humanly possible, give your image a meaningful file name.  DSC00190.jpg doesn't convey any useful information.  If you like keeping the sequence number, why not rename it to:
"DSC00190 Stickley Recliner Final Dry Fit view from front.jpg" ?
Yep, nothing wrong with spaces in filenames, and it makes searching for the image you want much easier.  If you manipulate images a lot, consider adding suffixes such as the date, and if you've resized it from the original, note that too.  So your final filename for a version you plan to post on the web or send in an email might be:
"Stickley Recliner Final Dry Fit view from front 2009 September 19 800x600.jpg"
Yep, I leave the sequence number off, and simply use the sort order to group pictures in the same series, or I add my own sequence number:
"Stickley Recliner 001 Grain selection for parts 2009 September 07.jpg"
...so that even if I want basically the same filename for the next 5 shots, the rest of the pictures in the sequence (002, 003, etc.) are still unique.  I leave date at end so that even if a particular group of pictures span a few days, they will still be grouped together.  But really, what ever works for you is perfect.
畫意能達萬言  
A Picture's Meaning Can Express Ten Thousand Words.

Saturday, July 25, 2009

Tool repair: Hacksaws, Bench Grinders and ACE Hardware

As a known estate and garage sale habitué, it shouldn't surprise anyone that more than half of my tools are less than new & are sometimes purchased in need of love.
Today (out of a box of tools labelled "50 sents each") I got a reciprocating saw-blade holder. Really, just a handle that would let you use Sawzall blades as a small handsaw. This one was made by Craftsman, and except for the missing thumbscrew to secure the blade is in great shape. Of course I tried to track it down, but it either came as an included accessory of a reciprocating saw, or wasn't deemed worthy of maintaining parts for (the plate that grips the blade is trapped / non-removable, so the only replacement part *IS* the thumbscrew.) No matter, my local ACE hardware has a ton of bolts and thumbscrews, so an easy fix.
Took the handle to the store and using the bins of bolts determined that it was 1/4", 20 tpi (threads per inch.) Second step was to decide what sort of head I wanted - wing nut, thumbscrew, slotted, hex drive with round knurled side - lots of options. Having no idea what the original looked like (although I'm guessing low-profile knurled edge, coin-slot to tighten so as not to get in the way) I decided on a thumbscrew. I may have gone with something with a lower-profile head, but this handle can be used to grip the blade either way - straight up, or flipped 180 degrees, so if a thumbscrew would get in the way one way, I could simply remove and flip the blade and retighten and be back in business.
ACE "only" had 2 lengths in the thread size that I needed - too long, and even longer. I really only need 3/8" of threaded length and leaving it long would have gotten in the way even worse. So, in addition to the thumbscrew, I also bought a stainless steel nut of the right size, and a couple washers. Sure, I probably have those, but rather than finding them in the garage, it was easy to spend the extra 20 cents to save time. After I got home, I slipped the washers onto the thumbscrew and tightened down the nut - the threads under the washers and nut were about the length that I wanted. If I wanted to leave any longer length of threads, I would have bought 2 nuts and not bothered with the washers and simply tightened the nuts against each other. I then used a hacksaw (although using my reciprocating saw would have had a certain poetry to it) to cut off the extra threads. The next part could be accomplished with a hand file, but I wanted this tool to cost less than buying one new (time is money) so I used a bench grinder to smooth the end of the threads up to the stainless steel nut. Depending on how good your hacksaw job is, this can be pretty painless & accomplished quickly without the need for quenching.
I then removed the nut and washers, and did a trial fit. Note - one of the main reasons for putting the nut(s) on is so that you can keep the threads clean / relatively burr free. Simply removing the nut slowly can clean up / chase the threads a bit for you. That is why I spent the extra couple of cents on the stainless steel nut - as it was a bit harder than the thumbscrew, it was adjusting it, rather than the thumbscrew adjusting the nut. If there was room for 2 nuts, I wouldn't have bothered with stainless steel. Trial fit - a bit long. Replaced the nut without the washers and got a cube of ice from the kitchen. Too short to make an adjustment cut with a hacksaw, I would have to grind off about the thickness of a washer. Tightly trapping the "thumb" part of the screw between my thumb and cradled ice cube, I ground off what I needed, rounding a bit this time to allow easier insertion. I got the idea for using ice for grinding from Frank Ford's Frets.Com website. Thanks Frank! It works great! The whole site is interesting / useful, but his shop tips are wonderful.
To conclude - even if a part isn't available, there isn't any reason you can't find (and adjust) something into a suitable replacement. A minimum number of metalworking tools you should already have (hacksaw, bench grinder, files) will get you there most of the time. Ice is wonderful for grinding & will prevent you from removing temper and/or keep you from burning yourself. A well stocked local hardware store is worth its weight in... ...broken tools that would otherwise be binned or recycled. If it is a complex part, try the manufacturer first, generally through their website.