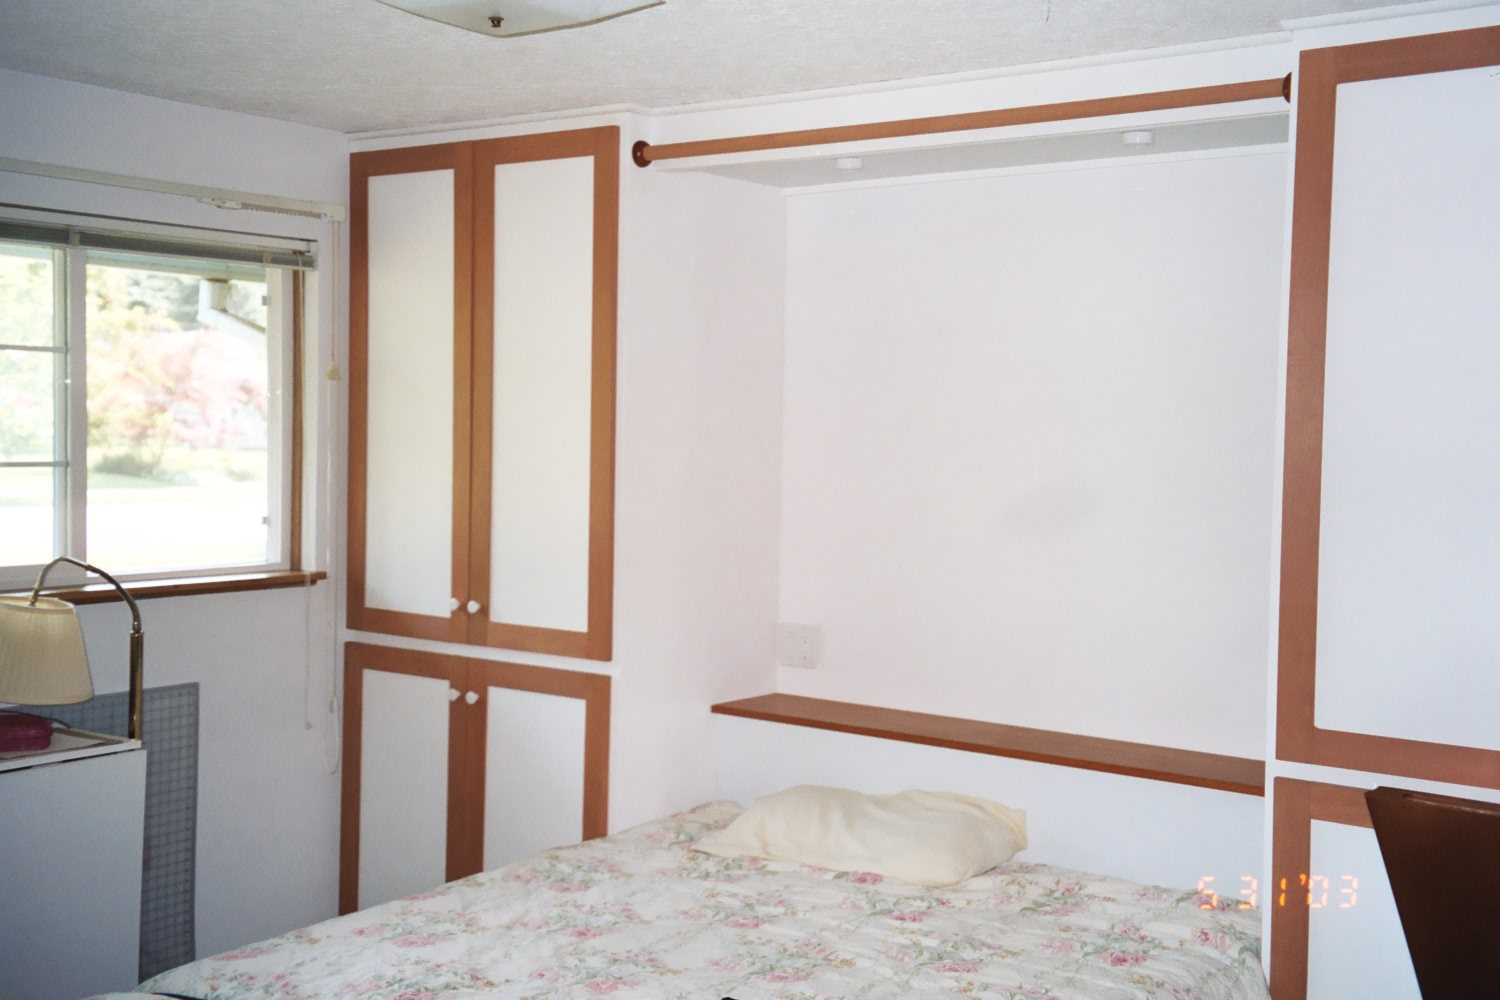
This is a nice built-in project that Greg and I did for our folks 6 years ago. This Murphy bed wall system was installed in Mom's sewing room so that they would have a good-sized guest bed for an approaching family reunion. Plus, Mom needed additional storage for fabric and sewing supplies. This post is about the details of how and why the project happened like it did.
Initially the folks looked at buying a Murphy bed type solution with storage from one of the local companies that specialize in bedrooms, closets and other built-ins. Unfortunately, none of the systems had deep enough cabinets and the best of what was offered wouldn't fit the space very well. Ended up buying the Queen size bolt to the floor version of the original Murphy Bed mechanism and designing and building the cabinets ourselves.
 Design:
Designing the cabinets was fairly straightforward - the internal shelves were sized vertically to fit the clear plastic tubs Mom uses to store fabric & the width of each side cabinet was dictated by the size of the bed and the width of the wall. Depth was determined by existing window placement. Enough clearance was left so that the window doesn't look off center or out of place in the room & so the doors next to the window opened well. The bottom and middle shelves between the upper and lower doors are fixed, the rest are adjustable. 6 nearly identical rectangular frames were used - 2 support the bottom shelves (and to provide for a toe-kick just taller than the baseboard molding) 2 support the middle shelves and the other two keep the cabinet square at the top. The 4 side pieces are 3/4" hardwood plywood with a birch veneer on one side and a maple veneer on the other, with 1/4" shelf peg holes spaced every 2". Above the bed frame is a simple rectangular bridge, lipped internally to support a floating panel with a couple of puck lights controlled by a light switch at the head of the bed. The headboard is removable as it would be in the way with the bed in the storage position. With the original Murphy Bed mechanism, legs supporting the foot of the bed automatically deploy as the bed is lowered into position. Kinda cool, but what that means is that the only standard way to conceal the bed when it is in the upright position is with doors - which would get in the way and give the head of the bed too much of a cave feeling while it was being used, as the deeper side cabinets would prevent the doors from folding the full 180 degrees. Even bi-fold doors wouldn't work for what the folks wanted. We could have solved the problem by bringing the bed further into the room so that the front of the stowed bed / middle cabinet would be proud of the side cabinets so that the doors could fold back (many of the standard designs are like that) but that would have made it a bit harder to get around the end of the bed when it was down, and make for a cramped guest bedroom. Instead, we put a groove in the front edge of the top bridge, and made a slightly taller than toe-kick height base board with an identical groove which accept 2 lightweight melamine face 1/4" pieces of plywood. The closet rod was added latter as a bar to display quilts.
 Construction:
As the carpet was to be replaced, we pulled it back from the wall where the Wall-bed system was going, removing the tack-strips and molding. We left the carpet in place on the rest of the floor temporarily, to act as a built-in padded drop cloth. We cleaned and painted the wall and repaired the damage left by the tack strips. The bed mechanism was to be bolted to the floor, but as there was still going to be carpet in the room we used a piece of plywood roughly the same thickness as the new carpet and pad between the mechanism and the floor. We measured off exact center and installed it with just 1 additional inch over the minimum distance to wall. Bolting it down was accomplished with the lag bolts that were not provided with the bed kit - too many types of floors to anticipate them all. The parts installed in relatively large pieces, installing each tensioned spring required the most muscle.

The molding that was installed on the now hidden wall was cut and moved to the toe-kick of the new built in cabinet. 1/2" Quarter-round was used to trim the cabinet to the ceiling as the rest of the room was left without crown molding. The headboard has a lighted switch for the puck reading lights and outlets for additional lights / radios / alarm clocks. The overhead bedroom-style light was eventually replaced with a florescent fixture.
Use:
The room's primary purpose is a sewing room. There is a large central layout and cutting table and two cabinet sewing machines. Only the table has to be folded and rolled out of the way to use the bed. The two center panels are removed and stored - they are thin and lightweight. The bed is pulled down, a band is removed that keeps the mattress from shifting while it is stored. The headboard is put into place and the bed is made up with fresh bedding for guests. A quick process to transform a sewing room into a guest bedroom. Oh, they also have a picture hung over the bed, which completes the look.


No comments:
Post a Comment